目標
- セミモーダルビューを作成する
- セミモーダルビュー上のボタンを押すと、それを閉じた後に別ビューに遷移する。
登場物
Main.storyboardとViewControllerMenu.storyboardとMenuViewControllerDest1.storyboardDest2.storyboard
前提
- 今後Viewが増えていく状況を想定して、Storyboardを分割することを考える。Storyboard同士はStoryboard Referenceで結びつける。
セミモーダルビューの作成
検索して良く出てくるのはUIPresentationControllerを利用する方法。ただ今回はなるべくStoryboardで完結させたい。
そこで、以下のページを参考して作ることを考える。
ハンバーガーメニューを作成するには? - Swift Life
ファイル作成
Menu.storyboard、MenuViewController、 Menu.storyboard、Dest1.storyboard、 Dest2.storyboardの5つをあらかじめ作成しておく。
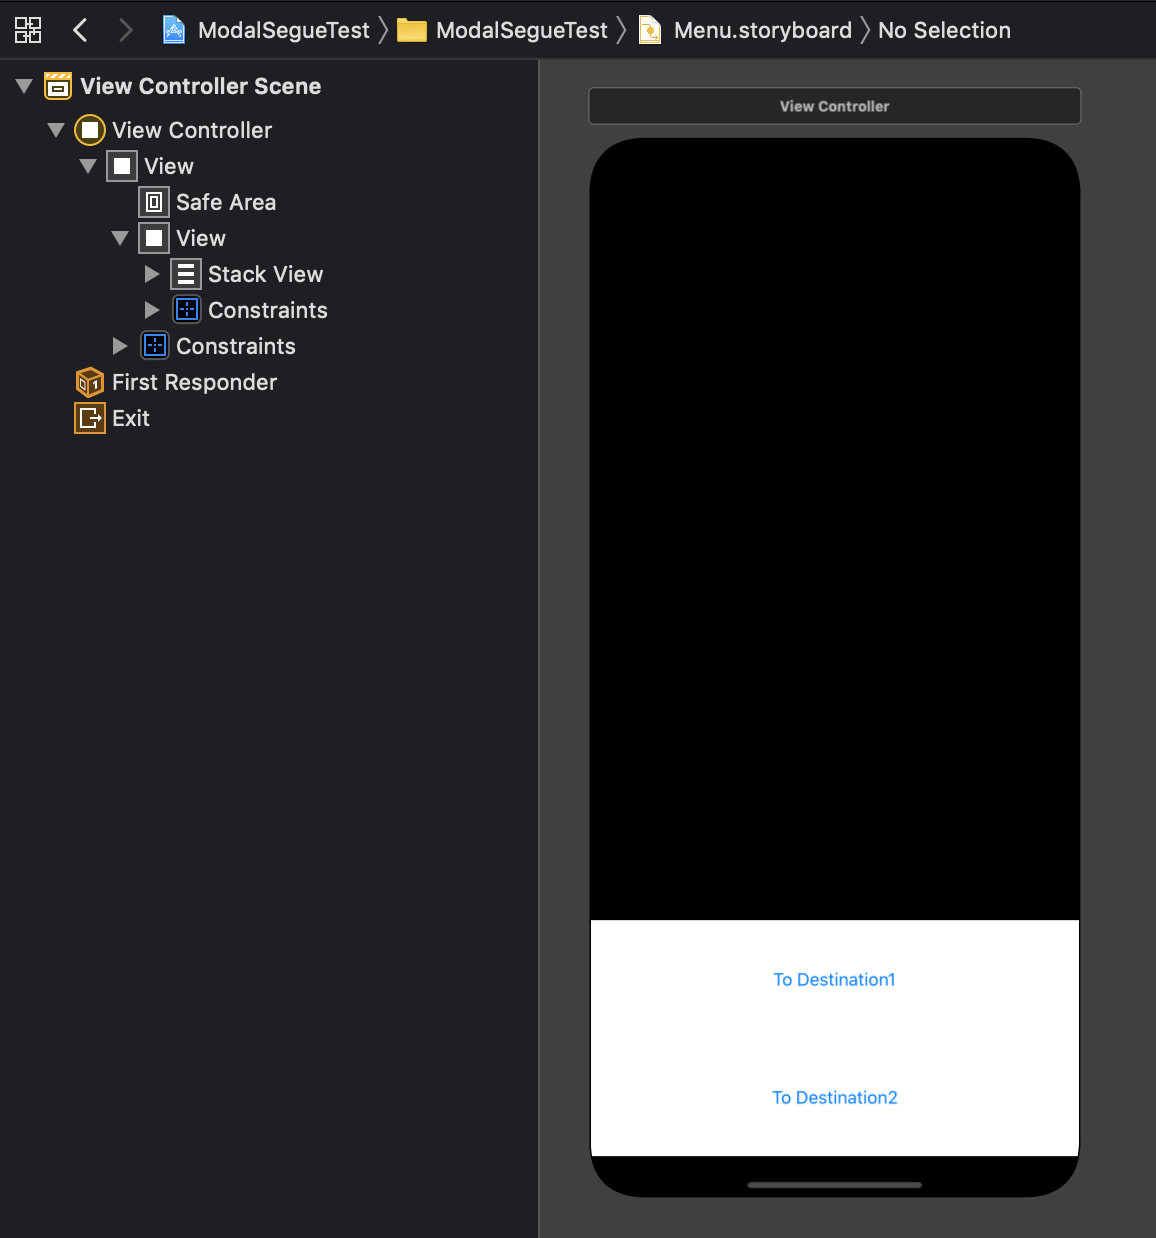
Menu.storyboard
classにはMenuViewControllerを指定する。部品配置は以下のようにする。
全体を包むViewを親View、その中に作ったViewを子Viewと呼ぶことにすると、
- Constraintは適当に設定する。子Viewが画面下に配置されるようにする。
- StackViewにはFill Equallyの設定を行っておく。
- 親Viewの背景色を、黒の半透明に設定する。設定手順は以下の通り。
- BackgroundをBlackに設定
- BackgroundをCustomに設定し直すと、カラーピッカーが現れる。そこで透明度を50%に設定する。
また、“Initial View Controller"にチェックをつける。
親Viewのtagを1に設定しておく。これはタッチイベントを捕捉する際に必要になる。
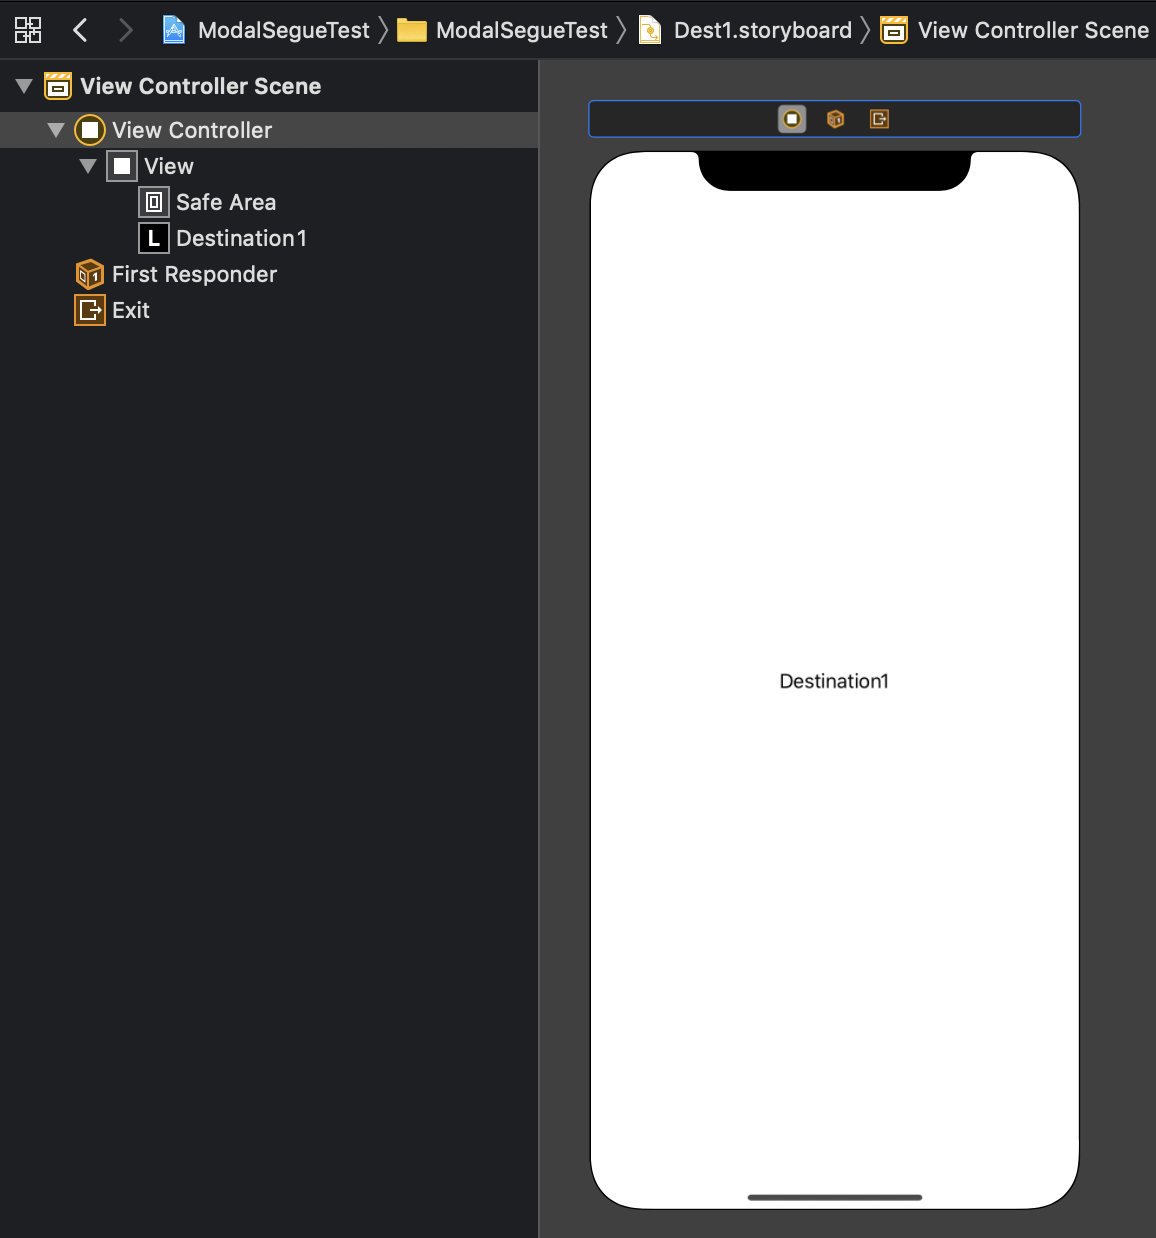
Dest1.storyboard、Dest2.storyboard
Dest1.storyboardの部品配置は以下のようにする。
“Is initial View Controller"にチェックをつける。
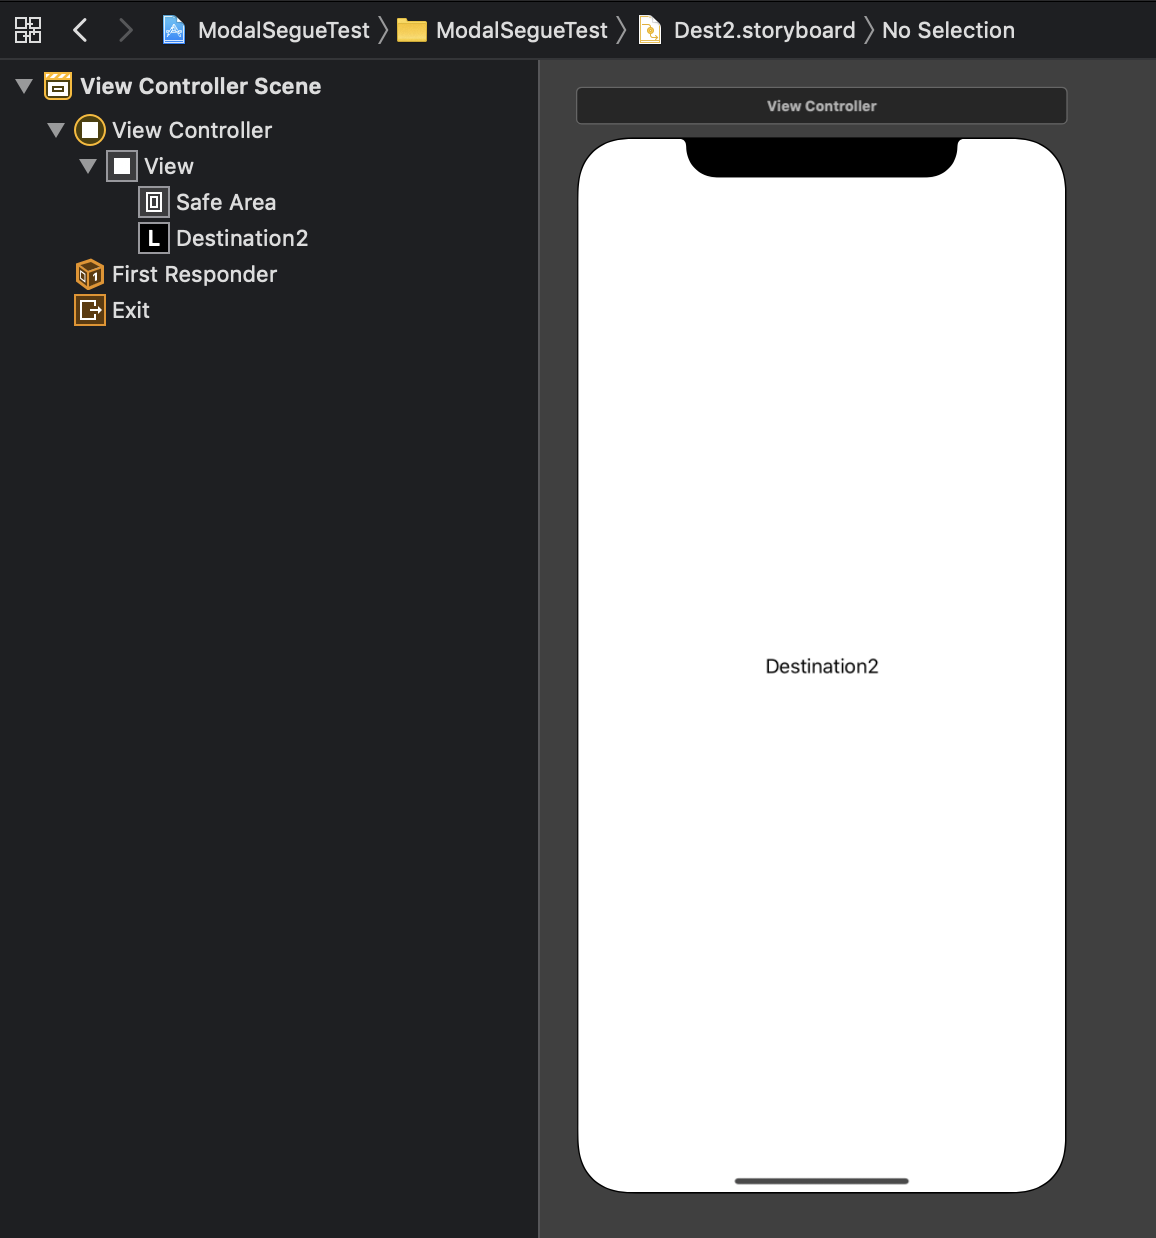
Dest2.storyboardの部品配置は以下のようにする。
“Is initial View Controller"にチェックをつける。
Main.storyboard
部品配置は以下のようにする。
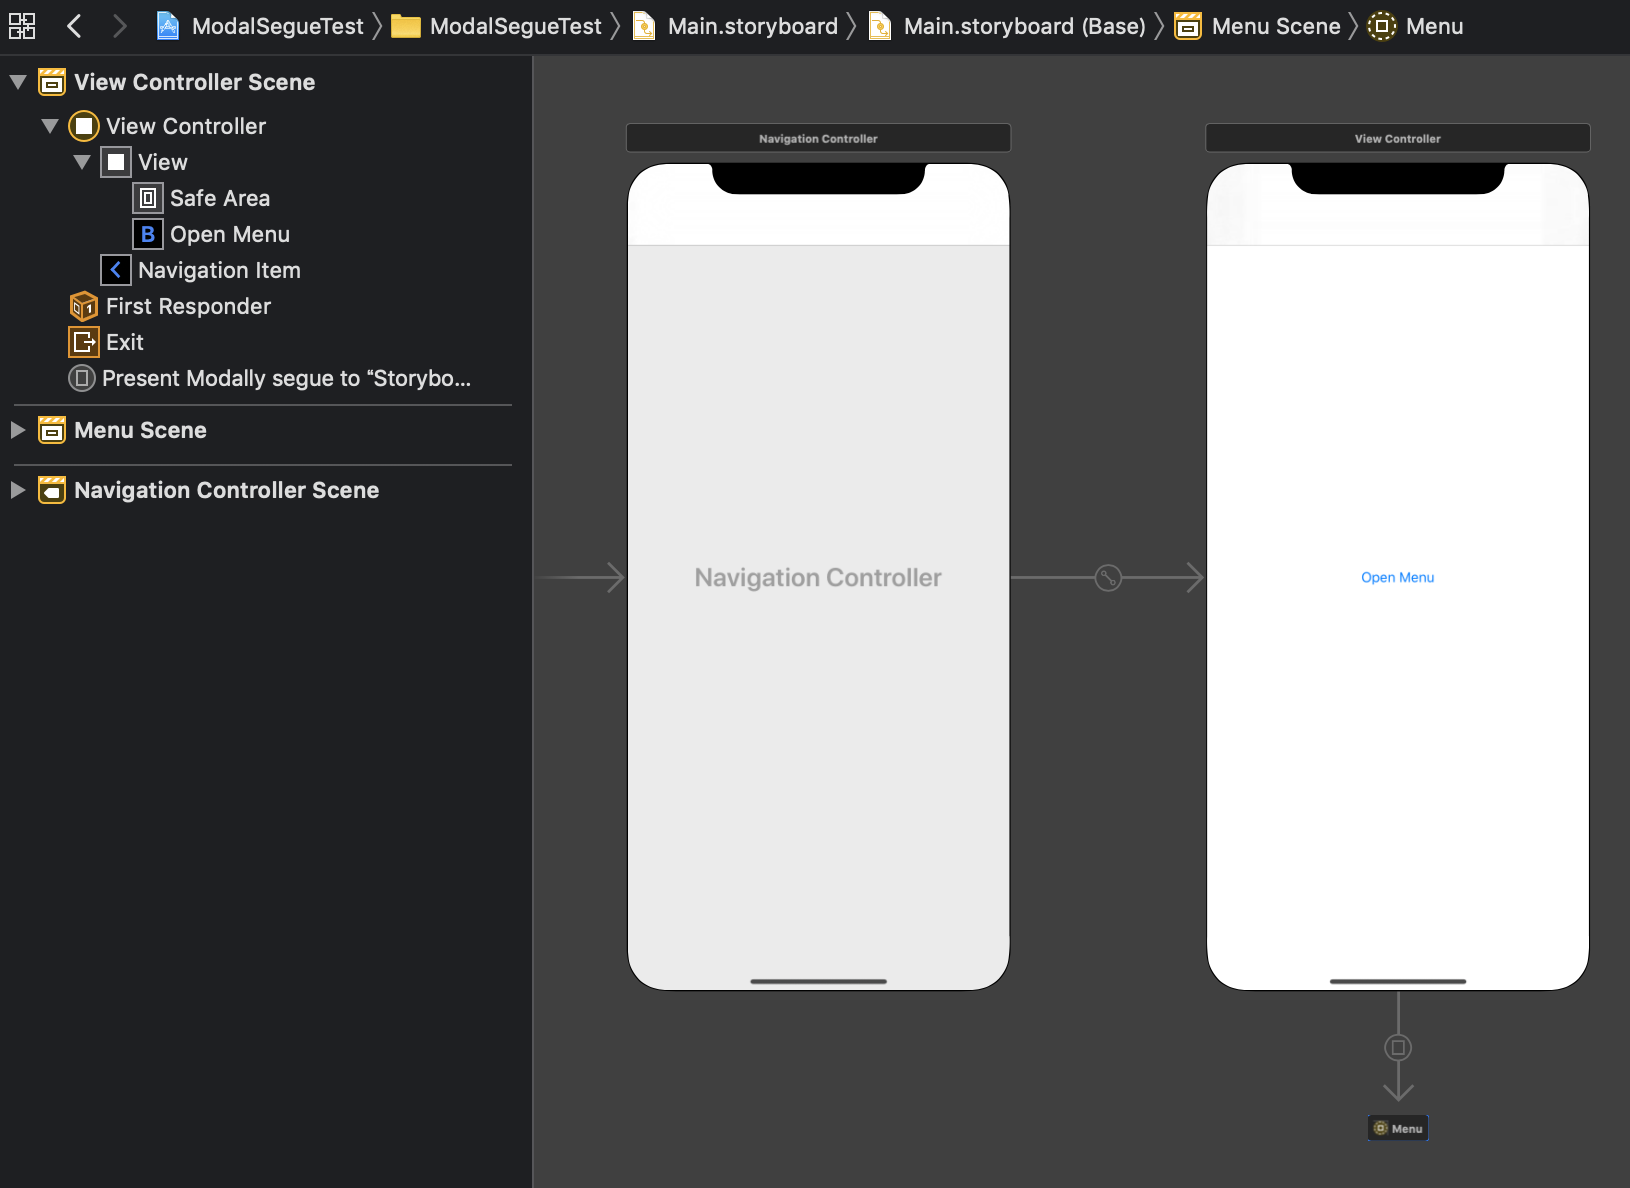
OpenButtonからStoryboard ReferenceへのSegueのActionは"Present Modally"を選択。Segueの設定は以下のようにする。
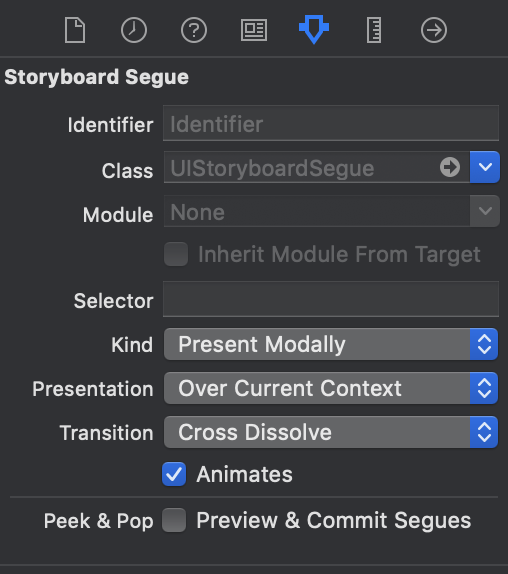
Storyboard Referenceにて、“Storyboard"をMenuに、“Referenced ID"を未記入にする。
“Referenced ID"が未記入の場合、Storyboard上のInitial View Controllerへの参照にしてくれる。もしInitial View ControllerでないViewControllerに遷移したいなら、ここに記入する。ただし、遷移先のView ControllerにてIdentifierを設定しておくことを忘れずに。
MenuViewController.swift
Menu.storyboardの小ViewのOutletを作成する。名前はmenuViewとする。
その上で以下の文を追記する。
| |
dismissメソッドを使うと自身のビューを閉じることができる。
モーダルビューを閉じてから遷移する処理
モーダルビュー上で直接Segueを作りたいところだが、そうするとモーダルビューの上にDestinationのViewが乗ってしまう。モーダルビューを閉じてから、Mainの方で遷移するように処理を書かなくてはいけない。
MenuViewController.ktにて、Menu.storyboardにあるボタン"To Destination1"と"To Destination2"のActionを設定する。それぞれの関数の実装を以下のようにする。
| |
MenuViewControllerを表示しているのは、Main.storyboardで定義されたNavigation Controllerである。これは試しにprint(presentingViewController)してみると分かる。従って、presentingViewControllerはUINavigationControllerにダウンキャストしている。
こうして得られたnavControllerについて、pushViewControllerメソッドを利用して遷移する。ビューを閉じた後に遷移したいから、dismissメソッドのcompletion引数にこの処理を書いている。ちなみに、dismissのcompletion内にnavControllerの宣言を書くと実行時エラーを起こすことに注意。なぜならcompletionの中では、presentingViewControllerはnilを返すから。completionはViewが破棄された後に呼ばれる関数。
instantiateInitialViewControllerで、Storyboard上のInitial View Controllerを作る(Storyboardで"Is initial view controller"にチェックをつけた理由はこれ)。InitialじゃないView Controllerを作りたいなら、instantiateViewControllerを利用する。このとき、遷移先のView Controllerにidentifierを設定しておくことを忘れないように。
遷移先のStoryboardににNavigation Controllerを持たせたい場合
遷移先がNavigation Controllerの場合、Navigation Controllerのルートに遷移するように書くだけ。Navigation ControllerをNavigation Controllerにpushしようとすると実行時エラーを吐かれるので注意。
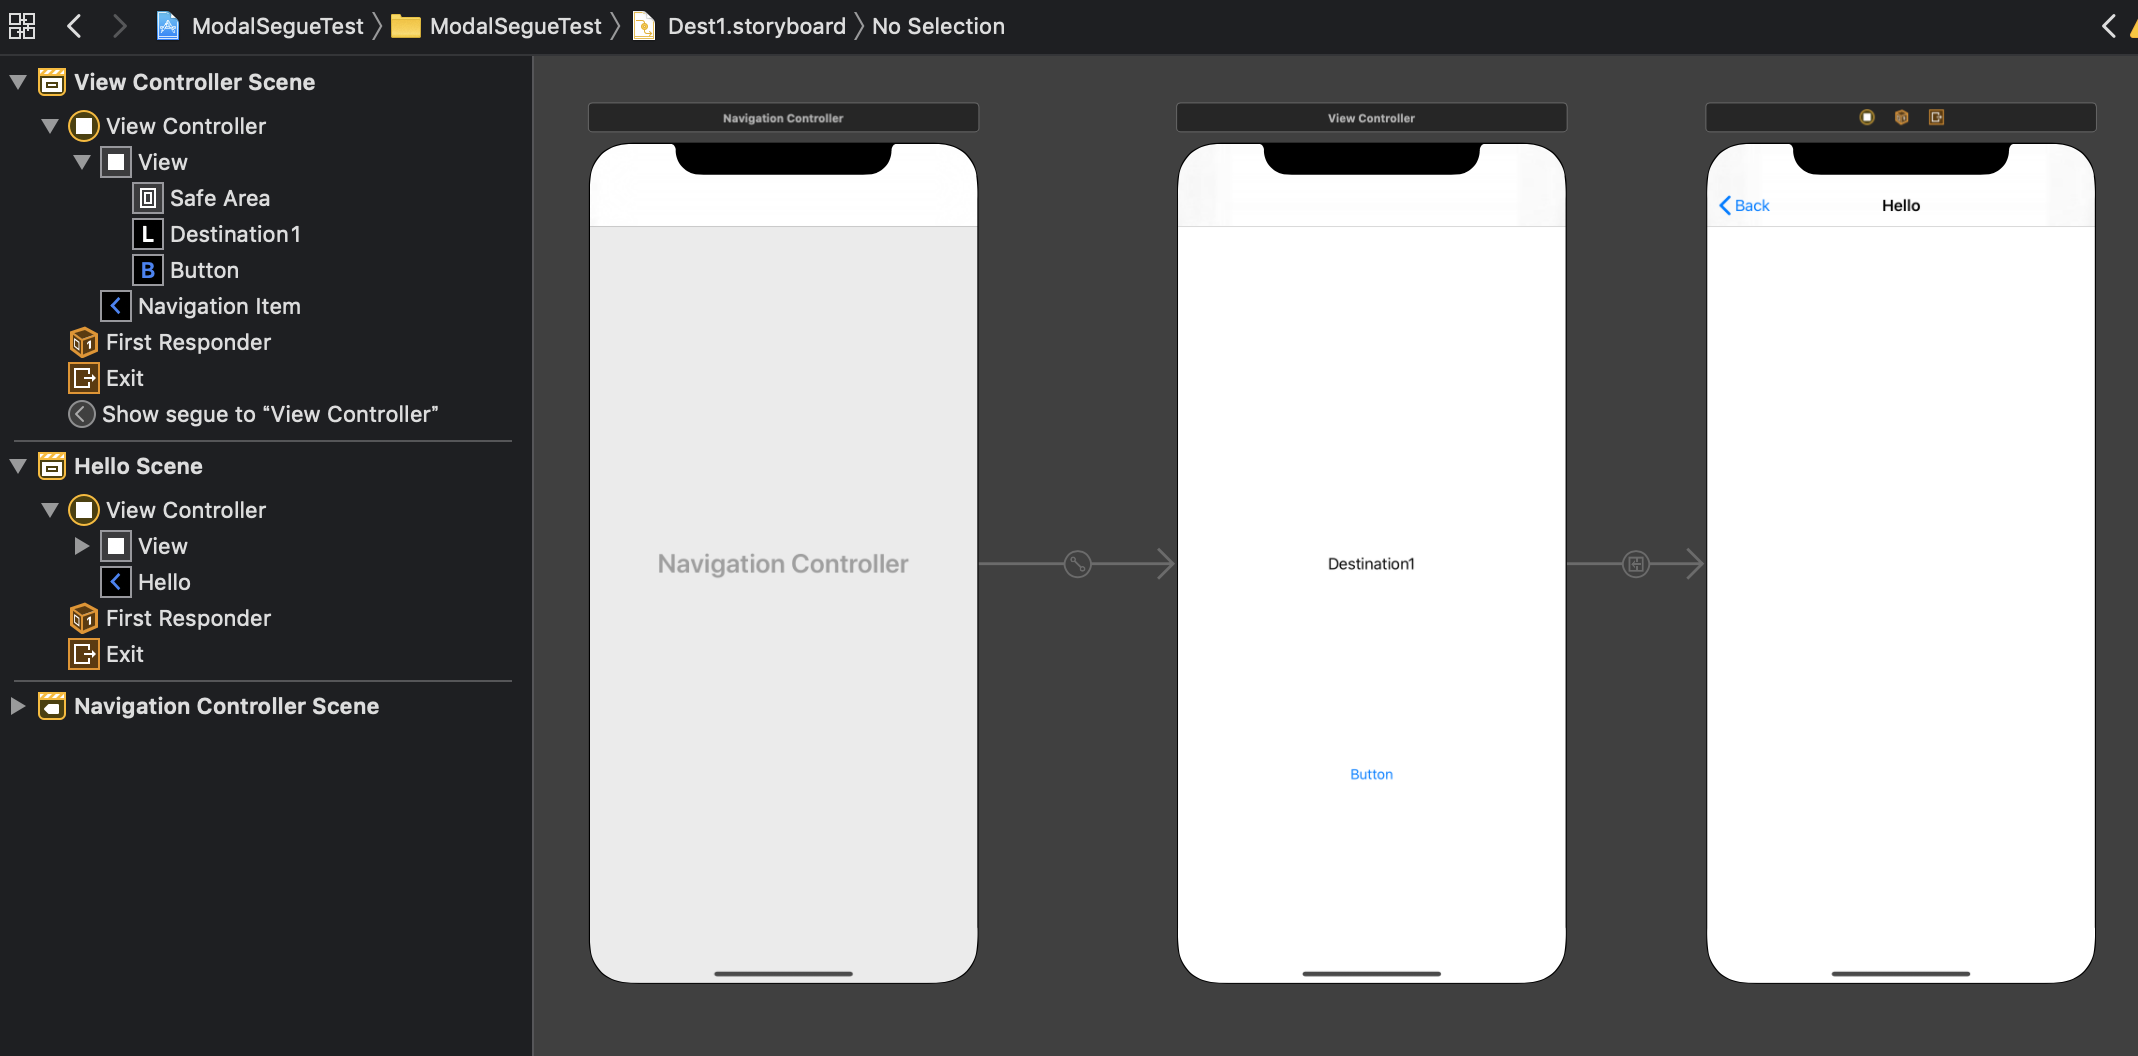
Dest1.storyboardの変更
部品構成を以下のようにする。
- NavigationItemのtitleをHelloに変更すると、上部にHelloが表示されるようになる。
ルートのView Controller(ラベルDistination1が書かれているもの)のidentifierをdest1に設定する。
MenuViewController.swiftの変更
メソッドdstOneTappedを以下のように変更する。
| |
ここで、let vc = sb.instantiateViewController(withIdentifier: "navigation controllerのID")と書いてはいけない。Navigation Controllerの中にNavigation Contollerをpushすることはできないため、pushViewControllerの呼び出し時にエラーになる。
その他の知見
この記事では利用しなかったが、大事そうな知見をここにまとめておく
Segueにおける値渡し
遷移元のViewControllerにて、prepare(for segue: UIStoryboradSegue, sender: Any?)関数をoverrideする。特定のSegueに対して値を渡したい場合は、segue.identifierでif文を書けば良い。
| |